Frequently asked questions (faq)
Содержание:
- 8 — Other Helpful Goodies
- Как пользоваться
- Попробуйте это мгновенный убийца монитора
- Introduction and Simple Examples
- Remapping the Keyboard and Mouse
- 4 — Running Programs & Websites
- SendPlay [v1.0.43+]
- Преимущества
- Other Features
- Alt-Tab Hotkeys
- Создать скрипт AutoHotkey с нуля
- Скачать AutoHotkey
- Variadic Functions [AHK_L 60+]
- Run a Script
- The Top of the Script (the Auto-execute Section)
- Introduction and Simple Examples
8 — Other Helpful Goodies
We have reached the end of our journey, my good friend. I hope you have learned something. But before we go, here are some other things that I think you should know. Enjoy!
a. The mysterious square brackets
Throughout the documentation, you will see these two symbols ( and ) surrounding code in the yellow syntax box at the top of almost all pages. Anything inside of these brackets are OPTIONAL. Meaning the stuff inside can be left out if you don’t need them. When writing your code, it is very important to NOT type the square brackets in your code.
On the ControlGetText page you will see this:
ControlGetText, OutputVar , Control, WinTitle, WinText, ExcludeTitle, ExcludeText
So you could simply do this if you wanted:
ControlGetText, OutputVar
Or add in some more details:
ControlGetText, OutputVar, Control, WinTitle
What if you wanted to use ExcludeTitle but not fill in WinText or WinTitle? Simple!
ControlGetText, OutputVar, Control,,, ExcludeTitle
Please note that you cannot IGNORE parameters, but you can leave them blank. If you were to ignore , it would look like this and cause issues:
ControlGetText, OutputVar, Control, ExcludeTitle
b. Finding your AHK version
Run this code to see your AHK version:
MsgBox, %A_AhkVersion%
Or look for «AutoHotkey Help File» or «AutoHotkey.chm» in the start menu or your installation directory.
c. Trial and Error
Trial and Error is a very common and effective way of learning. Instead of asking for help on every little thing, sometimes spending some time alone (sometimes hours or days) and trying to get something to work will help you learn faster.
If you try something and it gives you an error, study that error. Then try to fix your code. Then try running it again. If you still get an error, modify your code some more. Keep trying and failing until your code fails no more. You will learn a lot this way by reading the documentation, reading errors and learning what works and what doesn’t. Try, fail, try, fail, try, try, try, fail, fail, succeed!
This is how a lot of «pros» have learned. But don’t be afraid to ask for help, we don’t bite (hard). Learning takes time, the «pros» you encounter did not learn to be masters in just a few hours or days.
«If at first you don’t succeed, try, try, try again.» — Hickson, William E.
d. Indentation
This stuff (indentation) is very important! Your code will run perfectly fine without it, but it will be a major headache for you and other to read your code. Small code (25 lines or less) will probably be fine to read without indentation, but it’ll soon get sloppy. It’s best you learn to indent ASAP. Indentation has no set style, but it’s best to keep everything consistent.
«What is indentation?» you ask? It’s simply spacing to break up your code so you can see what belongs to what. People usually use 3 or 4 spaces or 1 tab per «level».
Not indented:
if (car = "old")
{
MsgBox, The car is really old.
if (wheels = "flat")
{
MsgBox, This car is not safe to drive.
return
}
else
{
MsgBox, Be careful! This old car will be dangerous to drive.
}
}
else
{
MsgBox, My`, what a shiny new vehicle you have there.
}
Indented:
if (car = "old")
{
    MsgBox, The car is really old.
    if (wheels = "flat")
    {
        MsgBox, This car is not safe to drive.
        return
    }
    else
    {
        MsgBox, Be careful! This old car will be dangerous to drive.
    }
}
else
{
    MsgBox, My`, what a shiny new vehicle you have there.
}
See Wikipedia’s Indentation style page for various styles and examples. Choose what you like or learn to indent how you think it’s easiest to read.
e. Asking for Help
Before you ask, try doing some research yourself or try to code it yourself. If that did not yield results that satisfy you, read below.
- Don’t be afraid to ask for help, even the smartest people ask others for help.
- Don’t be afraid to show what you tried, even if you think it’s silly.
- Post anything you have tried.
- Pretend everyone but you is a doorknob and knows nothing. Give as much information as you can to educate us doorknobs at what you are trying to do. Help us help you.
- Be patient.
- Be polite.
- Be open.
- Be kind.
- Enjoy!
If you don’t get an answer right away, wait at least 1 day (24 hours) before asking for more help. We love to help, but we also do this for free on our own time. We might be at work, sleeping, gaming, with family or just too busy to help.
And while you wait for help, you can try learning and doing it yourself. It’s a good feeling, making something yourself without help.
Как пользоваться
Дальше давайте переходить к практике и разбираться, где бесплатно скачать последнюю версию данного предложения, как его установить, а также как написать свой первый скрипт при помощи AutoHotkey.
Загрузка и установка
Начинать мы будем именно с установки. Тем более, что как таковой, ее здесь нет. Данная программа работает сразу после запуска. Рассмотрим, как его осуществить:
- Сначала мы загружаем архив с приложением, прокрутив страничку ниже и воспользовавшись кнопкой для его скачивания. Распаковываем исполняемый файл и запускаем его двойным левым кликом.
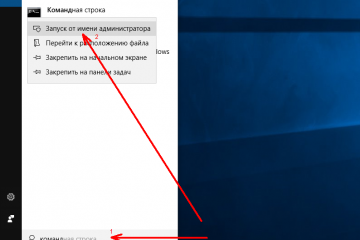
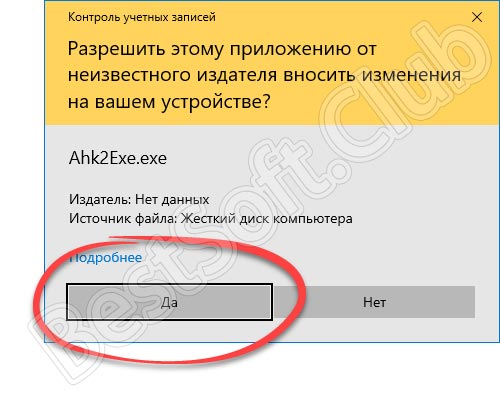
- Теперь нам необходимо предоставить доступ к администраторским полномочиям. В противном случае приложение не сможет корректно работать.
- На этом все. Наша программа установленная и теперь можно переходить непосредственно к работе с ней.
Инструкция по работе
Теперь давайте в общих чертах разберемся, как пользоваться данным приложением. Первое, что следует знать, это скриптовый язык программирования, который тут используется. Без него ни одного макроса написать, к сожалению, не получится. А сам алгоритм использования программы выглядит следующим образом:
- Вы пишите макрос, которым должна руководствоваться в своей работе AutoHotkey.
- Далее при помощи программы открываем данный скрипт и, при необходимости, преобразуем его в EXE-файл.
- Дальше мы можем использовать файл где угодно.
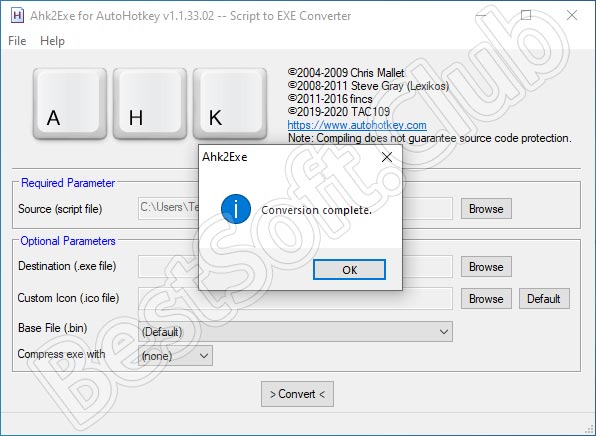
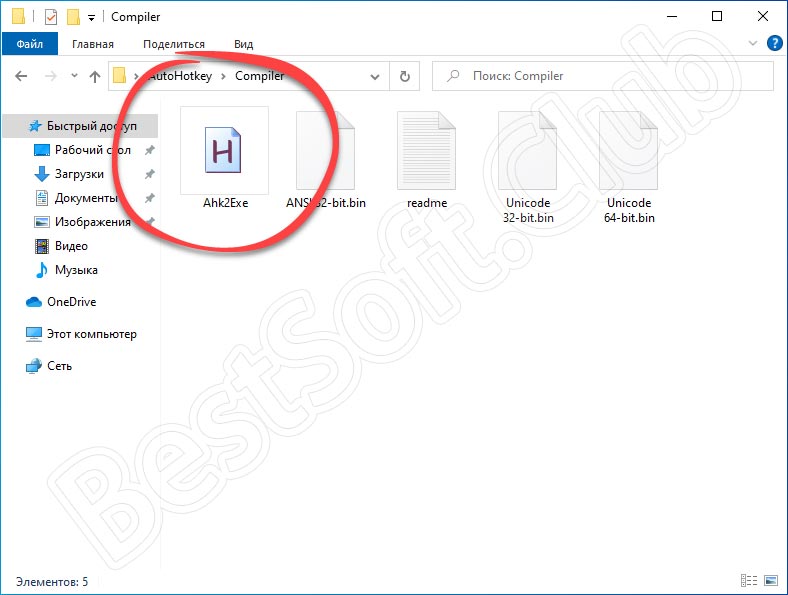
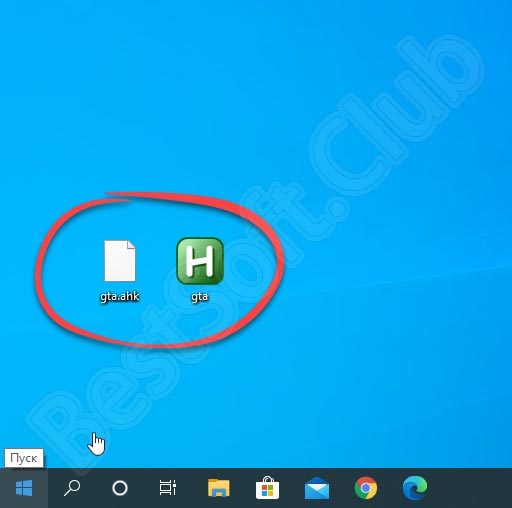
Вот так выглядит сам скрипт, а также созданный с его помощью исполняемый файл.
Попробуйте это мгновенный убийца монитора
AutoHotkey также может отправлять системные команды. Если вы целый день работаете за компьютером, возможно, вы не будете активно его использовать, но не хотите его выключать. Этот скрипт мгновенно обрежет сигнал на экране, а не будет ждать, пока он истечет, или заставка сработает.
Скачать: monitor_sleep.ahk
После загрузки откройте скрипт и нажмите F1, Разбудите его снова, перемещая мышь или нажимая любую клавишу на клавиатуре. AutoHotkey может управлять многими элементами вашей системы аналогично этому, включая отправку команд выключения, открытия пользовательских проводников Windows и даже команд в командной строке.
Introduction and Simple Examples
Hotkeys are sometimes referred to as shortcut keys because of their ability to easily trigger an action (such as launching a program or keyboard macro). In the following example, the hotkey Win+N is configured to launch Notepad. The pound sign stands for the Win key, which is known as a modifier:
#n::
Run Notepad
return
In the final line above, serves to finish the hotkey. However, if a hotkey needs to execute only a single line, that line can be listed to the right of the double-colon. In other words, the is implicit:
#n::Run Notepad
To use more than one modifier with a hotkey, list them consecutively (the order does not matter). The following example uses to indicate Control+Alt+S:
^!s::
Send Sincerely,{enter}John Smith  ; This line sends keystrokes to the active (foremost) window.
return
Remapping the Keyboard and Mouse
The syntax for the built-in remapping feature is . For example, a script consisting only of the following line would make the A key behave like the B key:
a::b
The above example does not alter the B key itself. The B key would continue to send the «b» keystroke unless you remap it to something else as shown in the following example:
a::b
b::a
The examples above use lowercase, which is recommended for most purposes because it also remaps the corresponding uppercase letters (that is, it will send uppercase when CapsLock is «on» or the Shift key is held down). By contrast, specifying an uppercase letter on the right side forces uppercase. For example, the following line would produce an uppercase B when you type either «a» or «A» (as long as CapsLock is off):
a::B
However, a remapping opposite to the one above would not work as one might expect, as a remapping never «releases» the modifier keys which are used to trigger it. For example, is typically equivalent to and is equivalent to . This is because each remapping to allow the key or key combination to be combined with other modifiers.
Mouse Remapping
To remap the mouse instead of the keyboard, use the same approach. For example:
| Makes the middle button behave like the Shift key. | |
| Makes the fourth mouse button behave like the left mouse button. | |
| Makes the right Alt key behave like the right mouse button. |
Other Useful Remappings
| Makes CapsLock become a Ctrl key. To retain the ability to turn CapsLock on and off, add the remapping first. This toggles CapsLock on and off when you hold down the Shift key and press CapsLock. Because both remappings allow additional modifier keys to be held down, the more specific remapping must be placed first for it to work. | |
| Makes the fifth mouse button (XButton2) produce a control-click. | |
| Makes the right Alt key become the Menu key (which is the key that opens the context menu). | |
| Makes the right Ctrl key become the right Win key. | |
| Makes both Ctrl keys behave like an Alt key. However, see . | |
| Makes Ctrl+X produce Ctrl+C. It also makes Ctrl+Alt+X produce Ctrl+Alt+C, etc. | |
| Disables the right Win key by having it simply return. |
You can try out any of these examples by copying them into a new text file such as «Remap.ahk», then launching the file.
See the Key List for a complete list of key and mouse button names.
4 — Running Programs & Websites
mspaint.exe, calc.exe, script.ahkRunhttps://www.autohotkey.com/
; Run a program. Note that most programs will require a FULL file path:
Run, %A_ProgramFiles%\Some_Program\Program.exe

; Run a website:
Run, https://www.autohotkey.com
There are some other advanced features as well, such as command line parameters and CLSID. If you want to learn more about that stuff, visit the Run page.
Here are a few more samples:
; Several programs do not need a full path, such as Windows-standard programs:
Run, notepad.exe
Run, mspaint.exe

; Run the "My Documents" folder using a :
Run, %A_MyDocuments%

; Run some websites:
Run, https://www.autohotkey.com
Run, https://www.google.com
For more in-depth information and examples, check out the Run page.
SendPlay [v1.0.43+]
Warning: SendPlay may have no effect at all if UAC is enabled, even if the script is running as an administrator. For more information, refer to the .
SendPlay’s biggest advantage is its ability to «play back» keystrokes and mouse clicks in a broader variety of games than the other modes. For example, a particular game may accept only when they have the .
Of the three sending modes, SendPlay is the most unusual because it does not simulate keystrokes and mouse clicks per se. Instead, it creates a series of events (messages) that flow directly to the active window (similar to ControlSend, but at a lower level). Consequently, SendPlay does not trigger hotkeys or hotstrings.
Like , SendPlay’s keystrokes do not get interspersed with keystrokes typed by the user. Thus, if the user happens to type something during a SendPlay, those keystrokes are postponed until afterward.
Although SendPlay is considerably slower than SendInput, it is usually faster than the traditional mode (even when KeyDelay is -1).
The Win keys (LWin and RWin) are automatically blocked during a SendPlay if the keyboard hook is installed. This prevents the Start Menu from appearing if the user accidentally presses a Win key during the send. By contrast, keys other than LWin and RWin do not need to be blocked because the operating system automatically postpones them until after the SendPlay (via buffering).
SendPlay does not use the standard settings of SetKeyDelay and SetMouseDelay. Instead, it defaults to no delay at all, which can be changed as shown in the following examples:
SetKeyDelay, 0, 10, Play  ; Note that both 0 and -1 are the same in SendPlay mode.
SetMouseDelay, 10, Play
SendPlay is unable to turn on or off CapsLock, NumLock, or ScrollLock. Similarly, it is unable to change a key’s state as seen by GetKeyState unless the keystrokes are sent to one of the script’s own windows. Even then, any changes to the left/right modifier keys (e.g. RControl) can be detected only via their neutral counterparts (e.g. Control). Also, SendPlay has other limitations described on the .
Unlike and , the user may interrupt a SendPlay by pressing Control+Alt+Del or Control+Escape. When this happens, the remaining keystrokes are not sent but the script continues executing as though the SendPlay had completed normally.
Although SendPlay can send LWin and RWin events, they are sent directly to the active window rather than performing their native operating system function. To work around this, use . For example, would show the Start Menu’s Run dialog.
Преимущества
- Программа имеет встроенный язык скриптов. По сути, он является высокоуровневым языком программирования способным вызывать и управлять функциями и переменными;
- Гибкая настройка параметров;
- Функция БИНД (или привязка) для любой клавиши, мыши или кнопки геймпада для выполнения выбранного действия;
- Установка функции автокей или автохоткей для клавиатуры. Возможность переназначить эту функцию на другое устройство ввода, например, на геймпад;
- Интуитивно понятный интерфейс программы, не смотря на множество функций и настроек. Текстовый редактор поддерживает синтаксис встроенного языка программирования, подсвечивая операторы и функции;
- Множество готовых скриптов различного назначения, которые можно скачать и использовать. Библиотека макросов регулярно пополняется. Почти любой макрос можно найти в интернете;
- Распространяется бесплатно. Не нужно искать генераторы ключей, кряки, опасаться за вредоносное ПО в них;
- Поддержка почти всех версий Windows, начиная с XP и заканчивая 10-й версией.
Other Features
NumLock, CapsLock, and ScrollLock: These keys may be forced to be «AlwaysOn» or «AlwaysOff». For example: .
Overriding Explorer’s hotkeys: Windows’ built-in hotkeys such as Win+E (#e) and Win+R (#r) can be individually overridden simply by assigning them to an action in the script. See the override page for details.
Substitutes for Alt-Tab: Hotkeys can provide an alternate means of alt-tabbing. For example, the following two hotkeys allow you to alt-tab with your right hand:
RControl & RShift::AltTab  ; Hold down right-control then press right-shift repeatedly to move forward.
RControl & Enter::ShiftAltTab  ; Without even having to release right-control, press Enter to reverse direction.
For more details, see .
Alt-Tab Hotkeys
Each Alt-Tab hotkey must be a combination of two keys, which is typically achieved via the ampersand symbol (&). In the following example, you would hold down the right Alt key and press J or K to navigate the alt-tab menu:
RAlt & j::AltTab
RAlt & k::ShiftAltTab
AltTab and ShiftAltTab are two of the special commands that are only recognized when used on the same line as a hotkey. Here is the complete list:
AltTab: If the alt-tab menu is visible, move forward in it. Otherwise, display the menu (only if the hotkey is an «&» combination of two keys; otherwise, it does nothing).
ShiftAltTab: Same as above except move backward in the menu.
AltTabMenu: Show or hide the alt-tab menu.
AltTabAndMenu: If the alt-tab menu is visible, move forward in it. Otherwise, display the menu.
AltTabMenuDismiss: Close the Alt-tab menu.
To illustrate the above, the mouse wheel can be made into an entire substitute for Alt-tab. With the following hotkeys in effect, clicking the middle button displays the menu and turning the wheel navigates through it:
MButton::AltTabMenu
WheelDown::AltTab
WheelUp::ShiftAltTab
To cancel a hotkey-invoked Alt-tab menu without activating the selected window, use a hotkey such as the following. It might require adjustment depending on: 1) the means by which the alt-tab menu was originally displayed; and 2) whether the script has the keyboard hook installed.
LCtrl & CapsLock::AltTab
!MButton::  ; Middle mouse button. The ! prefix makes it fire while the Alt key is down (which it is if the alt-tab menu is visible).
if WinExist("ahk_class #32771")  ; Indicates that the alt-tab menu is present on the screen.
    Send !{Escape}{Alt up}
return
Currently, all special Alt-tab actions must be assigned directly to a hotkey as in the examples above (i.e. they cannot be used as though they were commands). They are not affected by #IfWin or #If.
Custom alt-tab actions can also be created via hotkeys. In the following example, you would press F1 to display the menu and advance forward in it. Then you would press F2 to activate the selected window (or press Escape to cancel):
*F1::Send {Alt down}{tab} ; Asterisk is required in this case.
!F2::Send {Alt up}  ; Release the Alt key, which activates the selected window.
~*Escape::
if WinExist("ahk_class #32771")
    Send {Escape}{Alt up}  ; Cancel the menu without activating the selected window.
return
Создать скрипт AutoHotkey с нуля
До сих пор вы использовали сценарии других людей. Теперь давайте создадим простой эскиз с нуля, который возьмет все, что есть в нашем буфере обмена, и выполнит поиск в нем с помощью Duck Duck Go. Щелкните правой кнопкой мыши на рабочем столе Windows и выберите New> AutoHotkey Script, Кроме того, вы можете использовать любой текстовый редактор или IDE на ваш выбор
Текстовые редакторы против IDE: какой из них лучше для программистов?
Текстовые редакторы против IDE: какой из них лучше для программистов?Выбор между расширенной IDE и более простым текстовым редактором может быть трудным. Мы предлагаем некоторую информацию, чтобы помочь вам принять это решение.
Прочитайте больше
и введите следующее:
#s ссылается на ярлык для запуска сценария. Символ хеша относится к Ключ Windows, означающий, что Win + S наш выбранный ярлык. Этот ярлык зарезервирован для функции поиска Windows 10. В этом случае мы переопределяем его, то есть поиск DuckDuckGo произойдет на его месте. Если вы используете ярлык поиска Windows, замените его другой буквой.
Бежать Команда является одним из мульти-инструментов AutoHotkeys. Согласно документации откроется «Документ, URL, исполняемый файл (.exe, .com, .bat и т. Д.), Ярлык (.lnk) или системный глагол…». В этом случае AutoHotkey откроет URL в браузер по умолчанию.
Наконец, ? Д =% буфер% part – это команда для добавления URL с содержимым буфера обмена Windows.
Скачать AutoHotkey
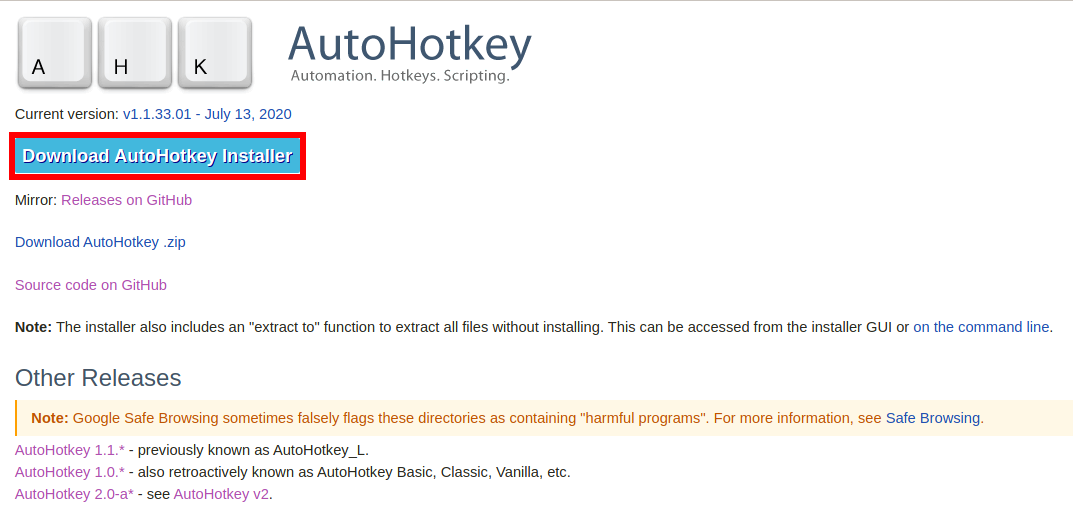
Там представлено несколько несколько версий, разберёмся в них:
- AutoHotkey 1.1.* — это актуальная версия, которая активно разрабатывается. Ранее была известна как AutoHotkey_L.
- AutoHotkey 1.0.* — развитие этой версии остановлено несколько лет назад, ранее была известна как AutoHotkey Basic, Classic, Vanilla.
- AutoHotkey 2.0-a* — альфа выпуск новой версии AutoHotkey v2.
Ветка AutoHotkey 2.0-a* является работоспособной, но в ней поменялся синтаксис языка по этой причине большинство готовых скриптов, которые вы можете найти в Интернете, в ней работать не будут.
То есть скачиваем версию AutoHotkey 1.1.*. Если вы хотите скачать установщик, то нажмите на кнопку «Download AutoHotkey Installer». Для скачивания портативной версии нажмите «Download AutoHotkey .zip».
Скачайте установщик, им проще пользоваться, чем портативной версией.
Variadic Functions [AHK_L 60+]
When defining a function, write an asterisk after the final parameter to mark the function as variadic, allowing it to receive a variable number of parameters:
Join(sep, params*) {
    for index,param in params
        str .= param . sep
    return SubStr(str, 1, -StrLen(sep))
}
MsgBox % Join("`n", "one", "two", "three")
When a variadic function is called, surplus parameters can be accessed via an object which is stored in the function’s final parameter. The first surplus parameter is at , the second at and so on. As with any standard object, can be used to determine the highest numeric index (in this case the number of parameters). However, if there are no parameters, MaxIndex returns an empty string.
Notes:
- The «variadic» parameter can only appear at the end of the formal parameter list.
- RegEx callouts cannot be variadic; the «variadic» parameter is tolerated but left blank.
- Callbacks pass surplus parameters rather than via an array.
Variadic Function Calls
While variadic functions can accept a variable number of parameters, an array of parameters can be passed to any function by applying the same syntax to a function-call:
substrings :=
MsgBox % Join("`n", substrings*)
Notes:
- Numbering of parameters within the source array begins at 1.
- Optional parameters may be entirely omitted from the array.
- The array of parameters may contain named items when calling a user-defined function; in any other case, named items are not supported.
- The target function may also be variadic, in which case named items are copied even if they have no corresponding formal parameter.
- This syntax can also be used when calling methods or retrieving properties of objects; for example, . : It can also be used for setting properties.
Known limitations:
- Only the right-most parameter can be expanded this way. For example, is supported but is not.
- There must not be any non-whitespace characters between the asterisk () and the symbol which ends the parameter list.
Run a Script
With AutoHotkey installed, there are several ways to run a script:
- Double-click a script file (or shortcut to a script file) in Explorer.
- Call AutoHotkey.exe on the command line and pass the script’s filename as a .
- After creating , launch AutoHotkey via the shortcut in the Start menu to run it.
- If AutoHotkey is pinned to the taskbar or Start menu on Windows 7 or later, recent or pinned scripts can be launched via the program’s Jump List.
Most scripts have an effect only while they are running. Use the or the ExitApp command to exit a script. Scripts are also forced to exit when Windows shuts down. To configure a script to start automatically after the user logs in, the easiest way is to place a shortcut to the script file in the folder.
Scripts can also be ; that is, combined together with an AutoHotkey binary file to form a self-contained executable (.exe) file.
The Top of the Script (the Auto-execute Section)
After the script has been loaded, it begins executing at the top line, continuing until a Return, Exit, hotkey/hotstring label, or the physical end of the script is encountered (whichever comes first). This top portion of the script is referred to as the auto-execute section.
Note: While the script’s first hotkey/hotstring label has the same effect as return, other hotkeys and labels do not.
A script that is not persistent and that lacks hotkeys, hotstrings, OnMessage(), and GUI will terminate after the auto-execute section has completed. Otherwise, it will stay running in an idle state, responding to events such as hotkeys, hotstrings, , custom menu items, and timers.
Every thread launched by a hotkey, hotstring, menu item, , or timer starts off fresh with the default values for the following attributes as set in the auto-execute section. If unset, the standard defaults will apply (as documented on each of the following pages): AutoTrim, CoordMode, Critical, DetectHiddenText, DetectHiddenWindows, FileEncoding, ListLines, SendLevel, SendMode, SetBatchLines, SetControlDelay, SetDefaultMouseSpeed, SetFormat, SetKeyDelay, SetMouseDelay, SetRegView, SetStoreCapsLockMode, SetTitleMatchMode, SetWinDelay, StringCaseSense, and Thread.
If the auto-execute section takes a long time to complete (or never completes), the default values for the above settings will be put into effect after 100 milliseconds. When the auto-execute section finally completes (if ever), the defaults are updated again to be those that were in effect at the end of the auto-execute section. Thus, it’s usually best to make any desired changes to the defaults at the top of scripts that contain hotkeys, hotstrings, timers, or custom menu items. Also note that each thread retains its own collection of the above settings. Changes made to those settings will not affect other threads.
Introduction and Simple Examples
A function is similar to a subroutine (Gosub) except that it can accept parameters (inputs) from its caller. In addition, a function may optionally return a value to its caller. Consider the following simple function that accepts two numbers and returns their sum:
Add(x, y)
{
    return x + y   ; "Return" expects an .
}
The above is known as a function definition because it creates a function named «Add» (not case sensitive) and establishes that anyone who calls it must provide exactly two parameters (x and y). To call the function, assign its result to a variable with the := operator. For example:
Var := Add(2, 3) ; The number 5 will be stored in Var.
Also, a function may be called without storing its return value:
Add(2, 3)
But in this case, any value returned by the function is discarded; so unless the function produces some effect other than its return value, the call would serve no purpose.
Since a function call is an , any variable names in its parameter list should not be enclosed in percent signs. By contrast, literal strings should be enclosed in double quotes. For example:
if (MyVar, "fox")
    MsgBox The variable MyVar contains the word fox.
Finally, functions may be called in the parameters of any command (except OutputVar and InputVar parameters such as those of StringLen). However, parameters that do not support must use the «% » prefix as in this example:
MsgBox % "The answer is: " . Add(3, 2)
The «% » prefix is also permitted in parameters that natively support expressions, but it is simply ignored.